
After construction, floors collect more dust, debris, and residue than any other area. Fine plaster dust, tile grout haze, concrete powder, timber sawdust, and adhesive marks settle across the entire surface. If these materials are not removed properly, they can damage the floor, cause scratches, affect air quality, and spread around the property.
Different Australian floor types , tiles, engineered timber, hybrid flooring, vinyl, polished concrete, and carpet , each require different cleaning steps. Using the wrong technique can ruin the finish or cause long-term damage.
This guide explains how to clean floors after construction, step-by-step, with explanations for every point so anyone can follow the process with confidence.
Why Proper Floor Cleaning Matters After Construction
A proper post-construction floor clean:
- Removes harmful dust
Construction dust (especially plaster and silica dust) can float in the air and cause breathing problems if not removed properly. - Protects new flooring
Heavy dust and debris can scratch tiles, timber, and vinyl if dragged around during cleaning. - Prepares the area for living or business use
Clean floors make the building safe and comfortable for occupants. - Improves indoor air quality
Dust left on floors spreads to other surfaces and keeps circulating. - Helps builders with handover
A clean floor creates a strong impression for clients during the final inspection.
Essential Tools Needed to Clean Floors After Construction
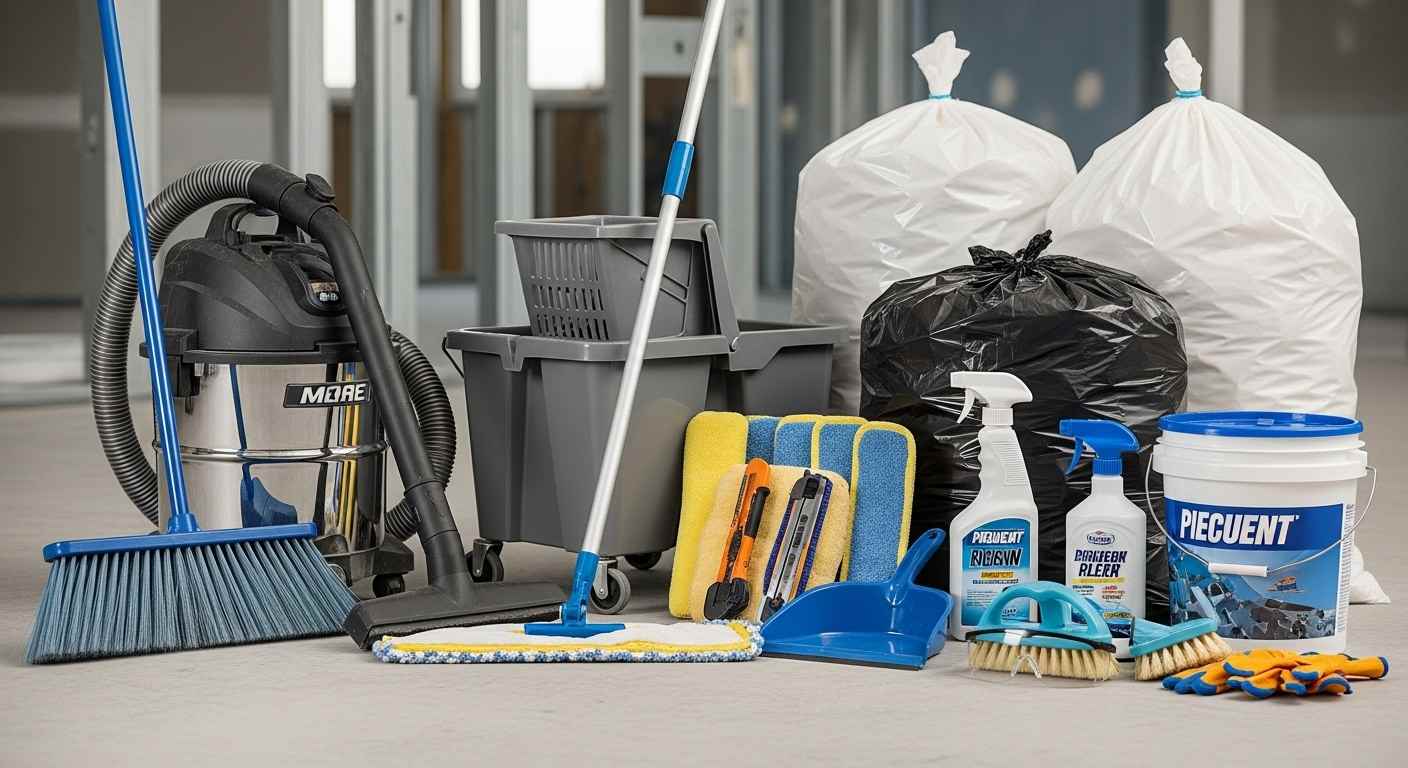
Below are the key tools with simple explanations of why each matters.
1. Industrial HEPA Vacuum
Used to remove fine plaster, timber, and concrete dust. A HEPA filter traps tiny particles that normal vacuums cannot capture.
2. Microfibre Mops
Microfibre traps dust without scratching the floor. It cleans better because it grabs fine particles instead of pushing them around.
3. Flat Mop System
Helps spread water evenly and prevents puddles, which is important for timber and hybrid floors that cannot handle too much moisture.
4. Neutral-pH Floor Cleaner
A gentle cleaner that does not damage floor coatings, tile glaze, or polished surfaces.
5. Plastic Scrapers
Safe for removing paint, glue, and silicone marks. Plastic prevents scratching unlike metal blades.
6. Buckets and Spray Bottles
Used to mix and apply cleaning solutions in controlled amounts to avoid soaking the floor.
7. Soft-Bristle Brooms
Useful for removing large debris before vacuuming to prevent scratches during later steps.
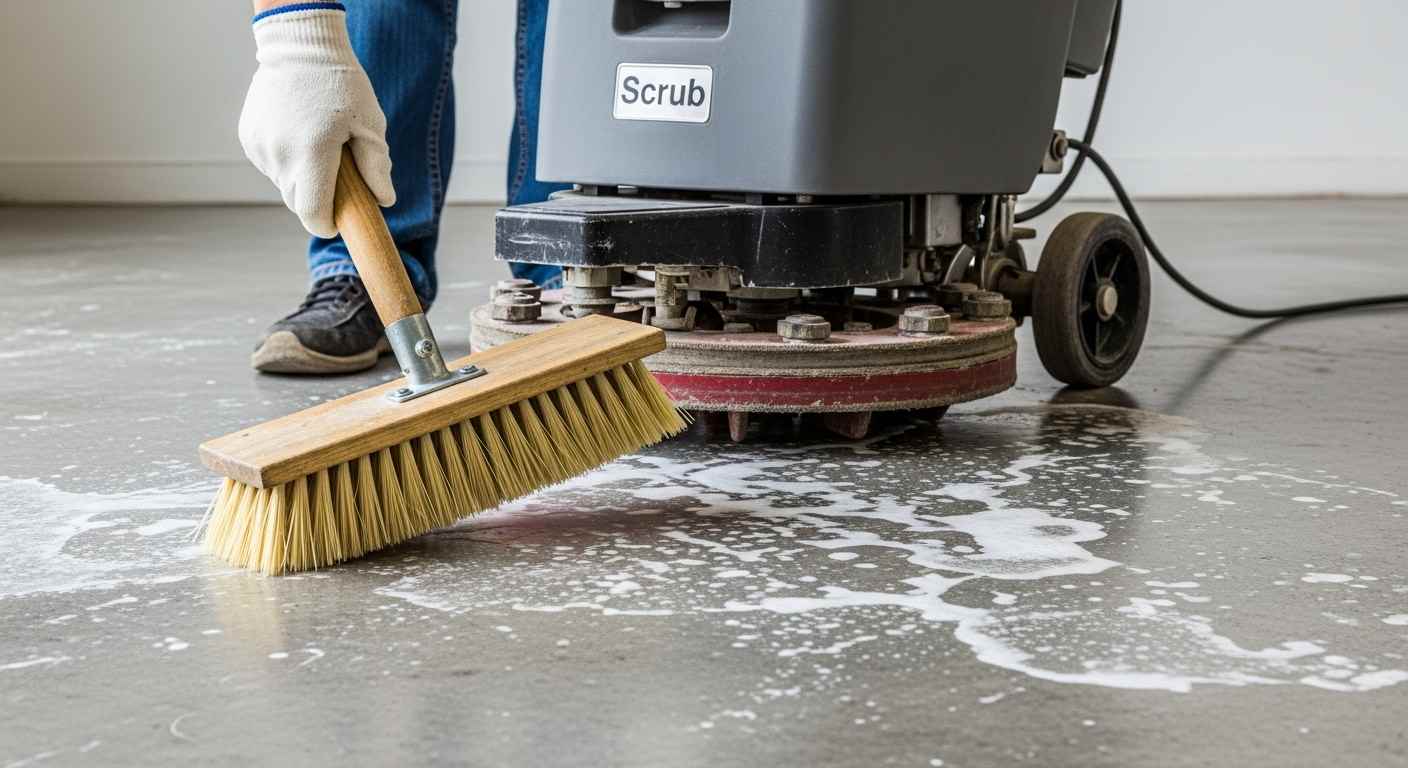
8. Floor Scrubber Machine (Commercial Jobs)
Walk-behind or ride-on scrubbers help clean large areas quickly and remove heavy dust from commercial sites.
9. Detailing Brushes
Small brushes help clean corners, grout lines, and tight spaces that mops cannot reach.
10. PPE (Personal Protective Equipment)
Gloves, goggles, boots, masks, and high-vis gear protect cleaners from dust, chemicals, and sharp debris.
General Process for Cleaning Floors After Construction
Step 1: Remove Loose Debris
- Removes plaster pieces, timber scraps, and packaging
- Prevents scratches caused by dragging debris during vacuuming
- Makes the next cleaning steps easier and safer
Step 2: Vacuum with a HEPA Vacuum
- Captures fine dust that regular vacuums leave behind
- Reduces airborne dust and improves indoor air quality
- Ensures the surface is clean before wet mopping
Step 3: Remove Sticky Residue and Marks
- Gets rid of paint splatters, silicone, or glue left by trades
- Prevents these marks from spreading during mopping
- Keeps the floor looking new and clean
Step 4: Wet Clean the Floor (Mopping)
- Removes the remaining layer of dust
- Lifts dirt from tile, vinyl, hybrid, and timber safely
- Helps restore the floor’s original appearance
Step 5: Rinse (If Needed)
- Removes leftover detergent
- Prevents streaks and dull patches
- Leaves floors with a clean, even finish
Step 6: Dry the Floor
- Prevents water damage (especially on timber and hybrid floors)
- Reduces the risk of slips and falls
- Prepares the area for final inspection
Step 7: Final Touch-Up
- Eliminates fingerprints, streaks, and small dust spots
- Ensures corners and edges are completely clean
- Leaves the floor looking fully finished for handover
How to Clean Each Floor Type After Construction
Different floors require different care. Below is the correct method for each flooring type in Australia.
1. Tile Floors
Step-by-step:
1. Vacuum all tiles
Removes dust that often settles in grout lines and tile edges.
2. Remove grout haze
Tile installers often leave a thin film on the surface. A mild tile-safe cleaner removes this without damaging the tile finish.
3. Mop with a neutral cleaner
Protects tile glaze and ensures streak-free results.
4. Detail corners and grout lines
Small brushes help remove dust stuck in small gaps.
5. Rinse with clean water
Prevents streaking and removes chemical residue.
2. Timber Floors
Step-by-step:
1. Vacuum using a soft-brush attachment
Prevents scratches while collecting dust.
2. Spot clean paint or glue
Use timber-safe cleaners; harsh chemicals can damage coatings.
3. Damp mop with very little water
Excess water can cause timber to swell or warp.
4. Buff the surface
A dry microfibre pad removes streaks and adds shine.
3. Hybrid Floors
Step-by-step:
1. HEPA vacuum gently
Removes all dust that may get trapped in joints.
2. Mop with a small amount of water
Hybrid floors resist water but still shouldn’t be over-wet.
3. Remove stubborn marks with plastic scraper
Protects the surface while removing dried plaster or paint.
4. Let the floor dry fully
Prevents moisture build-up under the boards.
4. Vinyl Floors
Step-by-step:
1. Vacuum carefully along edges
Dust gathers around skirtings and corners.
2. Mop with a neutral cleaner
Strong chemicals can damage the wear layer.
3. Avoid abrasive pads
Rough tools leave scratches and dull the finish.
4. Rinse lightly if needed
Prevents sticky or cloudy floors.
5. Polished Concrete Floors
Step-by-step:
1. HEPA vacuum concrete dust
Concrete dust is heavy and spreads easily when disturbed.
2. Mop with a gentle concrete-safe cleaner
Protects the sealant applied to polished concrete.
3. Use a floor scrubber for large area
Helps remove fine dust more evenly.
4. Squeegee away excess water
Prevents water spots and promotes fast drying.
6. Carpeted Floors
Step-by-step:
1. Vacuum slowly in multiple directions
Carpet fibres trap dust deeply, so slow passes work best.
2. Spot clean stains
Use carpet-safe removers to treat paint or adhesive marks.
3. Steam clean for heavy dust
Hot water extraction helps remove fine dust that vacuuming cannot reach.
Common Problems and Solutions
Problem 1: Dust keeps returning
Solution:
Clean high surfaces (walls, benches, window frames) before cleaning the floor.
Problem 2: Streaks after mopping
Solution:
Use a neutral cleaner and fresh water for rinsing.
Problem 3: Scratches found after cleaning
Solution:
Avoid metal scrapers and use soft tools only.
Problem 4: Sticky patches remain on the floor
Solution:
Use proper cleaning agents designed for paint, silicone, or adhesive removal.
Problem 5: Floors smell after cleaning
Solution:
Use low-odour cleaners and increase ventilation.
Safety Tips for Post-Construction Floor Cleaning
When cleaning floors after construction, safety should always come first. Always wear proper PPE such as gloves, masks, goggles and boots to protect yourself from dust, chemicals and sharp debris commonly found on building sites. Use HEPA vacuums to control fine plaster and silica dust, which can become airborne and affect breathing. Be cautious around wet floors to prevent slips, and never mix cleaning chemicals as this can create dangerous reactions. Keep all electrical tools and cords away from water to avoid electrical hazards, and always test any new cleaner on a small hidden section of the floor before using it widely. For full compliance and safe work practices, follow the standards set by SafeWork Australia for post-construction cleaning.
Benefits of Cleaning Floors Properly After Construction
Longer flooring life
Proper cleaning prevents damage and keeps floors in good condition long-term.
Protection against scratches
Removing debris early stops scratches caused by dragging dirt around.
Better indoor air quality
Removing plaster and silica dust improves breathing comfort inside the building.
Safer living or working space
Clean floors prevent slips, dust inhalation, and allergies.
Better visual presentation
A clean floor improves the look of a newly built home or workspace.
Improved hygiene
Construction dust carries bacteria, dirt, and debris. Cleaning removes all contaminants.
FAQs
What should I clean first after construction dust?
Start with vacuuming using a HEPA vacuum to remove fine dust.
Should I mop before vacuuming?
No. You must vacuum first to prevent dust from smearing.
What cleaner is safe for timber floors?
A gentle, neutral cleaner designed for timber surfaces.
How do I remove grout haze?
Use a mild tile-safe cleaner and a soft pad or mop.
Is steaming floors safe after construction?
Avoid steam mops on timber, vinyl, and hybrid floors.
How do I stop streaks on tiles?
Use clean water and a microfibre mop for the final rinse.
What vacuum should I use?
A HEPA vacuum designed for fine construction dust.
Can hybrid floors get wet?
Only small amounts of water are safe. Avoid soaking the floor.
How do I clean polished concrete?
Vacuum first, then mop with a neutral concrete cleaner.
Do carpets need professional cleaning?
If heavily dusted, steam cleaning helps remove deep debris.
Summary
Cleaning floors after construction requires patience, the right tools, and careful steps. Each flooring material in Australia, tiles, timber, vinyl, hybrid, concrete, and carpet, needs specific methods to avoid damage. HEPA vacuums, microfibre mops, neutral cleaners, and plastic scrapers are essential. Following proper techniques removes harmful dust, protects new surfaces, and prepares the property for a clean and safe handover.